What would we do without the internet? I wouldn’t know how to tie my shoe. The web has taught me an incredible amount of information about a variety of things including how to fix/maintain/repair my SAABs. So in light of that I thought I’d create a links page that would highlight some interesting and helpful links I’ve come across. Enjoy.
So your family is growing and you think you have to get rid of the saab? There is another option- the Diono Radian XRT Car seats.
My wife is expecting our third literally any hour now (her due date was Feb.1) and I needed to make our SAAB work for our family, so I did some research and found other SAABers have found a solution. This will probably not work with your normal Britax or Graco seats because of thier width, but the Diono Radian XRT is designed to be narrow, but without sacrificing safety. I am actually far more impressed with the weight and ruggedness of this seat over our old seats- and this seat will be the only one they will need until they’re in a normal belt.
For fitment the only thing I had to do was remove the headrests from both sides. To do this lift the head rests to the top and on the side that does not have the obvious button to lower them there will be a hidden button that your ignition key will fit into. Simply depress this button and the other and lift up. It may be easier to tilt the seat down to get at the button.
Viola.
2 Diono Radian XRT seats and a Chicco across a 2001 SAAB 9-5 Aero Wagon
I picked up a very clean 2001 9-3 with under 80K miles, but had a locked up motor. Trying to figure out the problem I put a few hundred pounds of torque on the crankshaft and didn’t get it to budge. I then proceeded to pull the cylinder head off and all looked fine. No sludge in the cylinder head, nothing broken, definitely not the look of a motor that was locked up the way it was. After I had pulled virtually everything and was ready to pull the engine I took off the crankshaft pulley and found the source of the binding- the oil pump had exploded. Fortunately I think this means that the engine isn’t toast like I originally thought. Although I already have another engine to go into the car the way the oil pump locked the engine up it may have prevented any real damage to the bearings. It did of course crack the timing cover and I’ll have to inspect the end of the crankshaft, but looks as though everything else in the motor may be reusable. Anyway this is the first I’ve seen an oil pump fail like this. Enjoy the pics and happy SAABing!
Many of you may know that most jobs on your SAAB are fairly straight forward and if all goes well you can be done quickly. The fact of the matter is the previous sentence has a huge “IF!” If a single bolt snaps off or a single nut is rounded off it can make a simple job into a nightmare that may require cutting and replacing parts you never intended.
It’s always a great idea to be ready for the inevitable broken stud (I have extra exhaust studs/turbo manifold studs on hand). Also be ready for the rounded off nut (have extra exhaust nuts on hand). I personally never throw any SAAB nuts/bolts away and actually have them all organized. If you ever come across a parts car in a junk yard take a few home with you.
Currently I have the engine of my 2001 SAAB 9-5 Aero Wagon on the floor of my garage and just drilled and extracted an exhaust stud. I actually didn’t know it was broken until I looked over my hardware and saw that one stud was too short. I’m glad I saw it because it would be 10X harder with the engine in the car.
Here are some pictures of the result.
I also found this set extremely helpful when my 8MM allen socket spun in the lower alternator bolt. It’s a sickly feeling, but I just selected the appropriate size IRWIN extractor tapped it in and had to use a breaker bar to pop it loose. It bit amazingly strongly and I didn’t drill it at all.
So I’ve done a mesh grille for my 2000 9⁵, but wanted to try it on my 2004 Aero. It was definitely more tricky and the cuts have to be much more precise and careful, so the cut edges don’t show and they are hidden by the chrome surrounds. Here are some pics of my results
Miracle! Just bought and installed the pixelfix kit. I had maybe 20% of my pixels. Installed the replacement and I have 100% of my pixels. The screen is perfect.
HOWEVER, it is not a no brainer, it takes some experimentation and patience. Here are some pointers:
1. There are 2 foam strips supplied. The instructions are not clear on how to use them. Use one of them on the display side only. Pull the rubber o ring back and put the foam strip in the groove under it. When you reassemble it be sure you pull the rubber back as you put the light bar and screen back together so it is aligned with the groove belowvand riding on top of the foam strip.
2. When aligning the strip on the display side place the scotch tape on the front of the SID to hold the ribbon in place, not the back side. Be really patient getting it aligned and adhered. IT took me several tries to get it right.
3. On the circuit board side of the assemble follow the instructions and slide one price paper under the rubber o ring. Do not use the foam in the groove, it generates too much pressure and uneven.
4. When I reassembled mine I found that where the screen assembly attached to the circuit board, there was a slight bow in the board that prevented even pressure of the o ring on the ribbon. I had to fold up a piece of paper 4 or 5 times and get it thick enough to slide between the circuit board and plastic housing as it slid back together…that put even pressure on the board and o ring and everything was perfect.
5. I had to slide it in and test it several times to get it right. It required disassembly and reassembly several times but if you are patient you will get it.
Phenomenal product. I purchase the replacement ribbon for the acc panel also but haven’t done that yet.
Let me know if you have any questions.
I thought this may be helpful knowing that there are others who are using the product and having similar results, but I’ll definitely echo 8pack’s comments by saying it is not a complete no brainer, but does take some determination and a steady hand. I had to take mine apart at least twice.
Anyone who owns an older SAAB 9-3 or 9-5 knows how annoying it can be to lose pixels on your SID (SAAB Information Display). The general reason of the problem is a ribbon cable that begins to degrade and lose contact with the circuit board and/or the LCD display.
There are a host of DIY solutions out there and I’ve tried virtually all of them. They are nearly all a shot in the dark because some will have great success and others terrible success. It all depends on the condition of this ribbon cable.
There are outfits that will repair your SID and for the love of God DO NOT use Kramer Micro Repair on eBay. Your repair will go something like this…
Him: “Got it, but it’s unrepairable, so I can sell you a good one.”
Me: “Uhhhh, OK just send me a good one.”
Him: “On it’s way that’ll be another $XXX.”
You receive it and he thinks it’s completely normal that there are like 10 pixels out and over time it will just lose more… The only reason he has ok feedback is when people receive them back it’s OK and you can’t leave feedback twice.
Maybe others can chime in, but I don’t have any other experience with other repair services.
Now getting to Pixlefix.net… Since the solution is actually replacing the ribbon cable I thought I’d give it a try! Below are some pictures I took of the whole operation. This is not for a job for the casual DIYer, but for someone with patience and determination. So the question is did I have success… as you can see from the photos the before shots were terrible (probably around 2% of the pixels working) and the after shots weren’t bad (80%) working. I actually had to go in twice. The second time I placed some rubber bands around the LCD to put more pressure on the connection. Sorry there weren’t many pics of that part I got so deep in it I forgot about taking pictures.
So 80% isn’t bad… but I think my problem is I may have damaged the ribbon cable by moving it around, so I’m going to contact pixelfix and see if I can’t get a replacement ribbon cable and give it another go. If they send me one I’ll put more detailed photos and perhaps a short video of the procedure.
UPDATE!!!!! 7/13/2011
So the 80% fix was because I messed up with the SID 1 vs SID 2 cable. Here’s my suggestion… before you order a ribbon cable pull your SID apart and compare your ribbon cable with the pics on the website. If you watch my video you’ll see I have two different SIDs, both say SID 2, but one had a SID 1 ribbon cable.
Anyway… I can’t recommend this fix enough. Pixelfix.net is GREAT! If I had to do it again it’d probably take me 15 minutes and I’d have a perfect SID. So if you want me to take care of it email me and we might be able to work something out.
If you are considering an upgrade from your LPT (Light Pressure Turbo) stock setup using the Garrett GT-17 turbocharger to the more powerful setup using the Mitsubishi TD-04 you may have this question. This video seeks to explain the difference between the two, but it is virtually a direct bolt up replacement.
The turbocharger of any car or truck can wear out and begin to leak oil into the exhaust/intake housings. You will know this is happening when huge plumes of white smoke begin coming out the tail pipe. Sometimes the car still runs and drives fine, but you dare not drive it because of the smoke screen that would put James Bond’s to shame. Also you shouldn’t drive it because you’re losing oil quickly.
Here’s a video from YouTube which describes what I’m talking about (Video from YouTuber SAABKyle04)…
The first thing you may be inclined to do is tow it or risk driving it to the local SAAB dealer who take a look and absolutely blow you away with a repair estimate of $1500-$2000. Even an independent shop or local mechanic will charge you out the nose. The truth is you have a few more options, even if you’re determined never to open your hood let alone turn a wrench at the very least you can source a rebuilt turbo for half the cost of a new one.
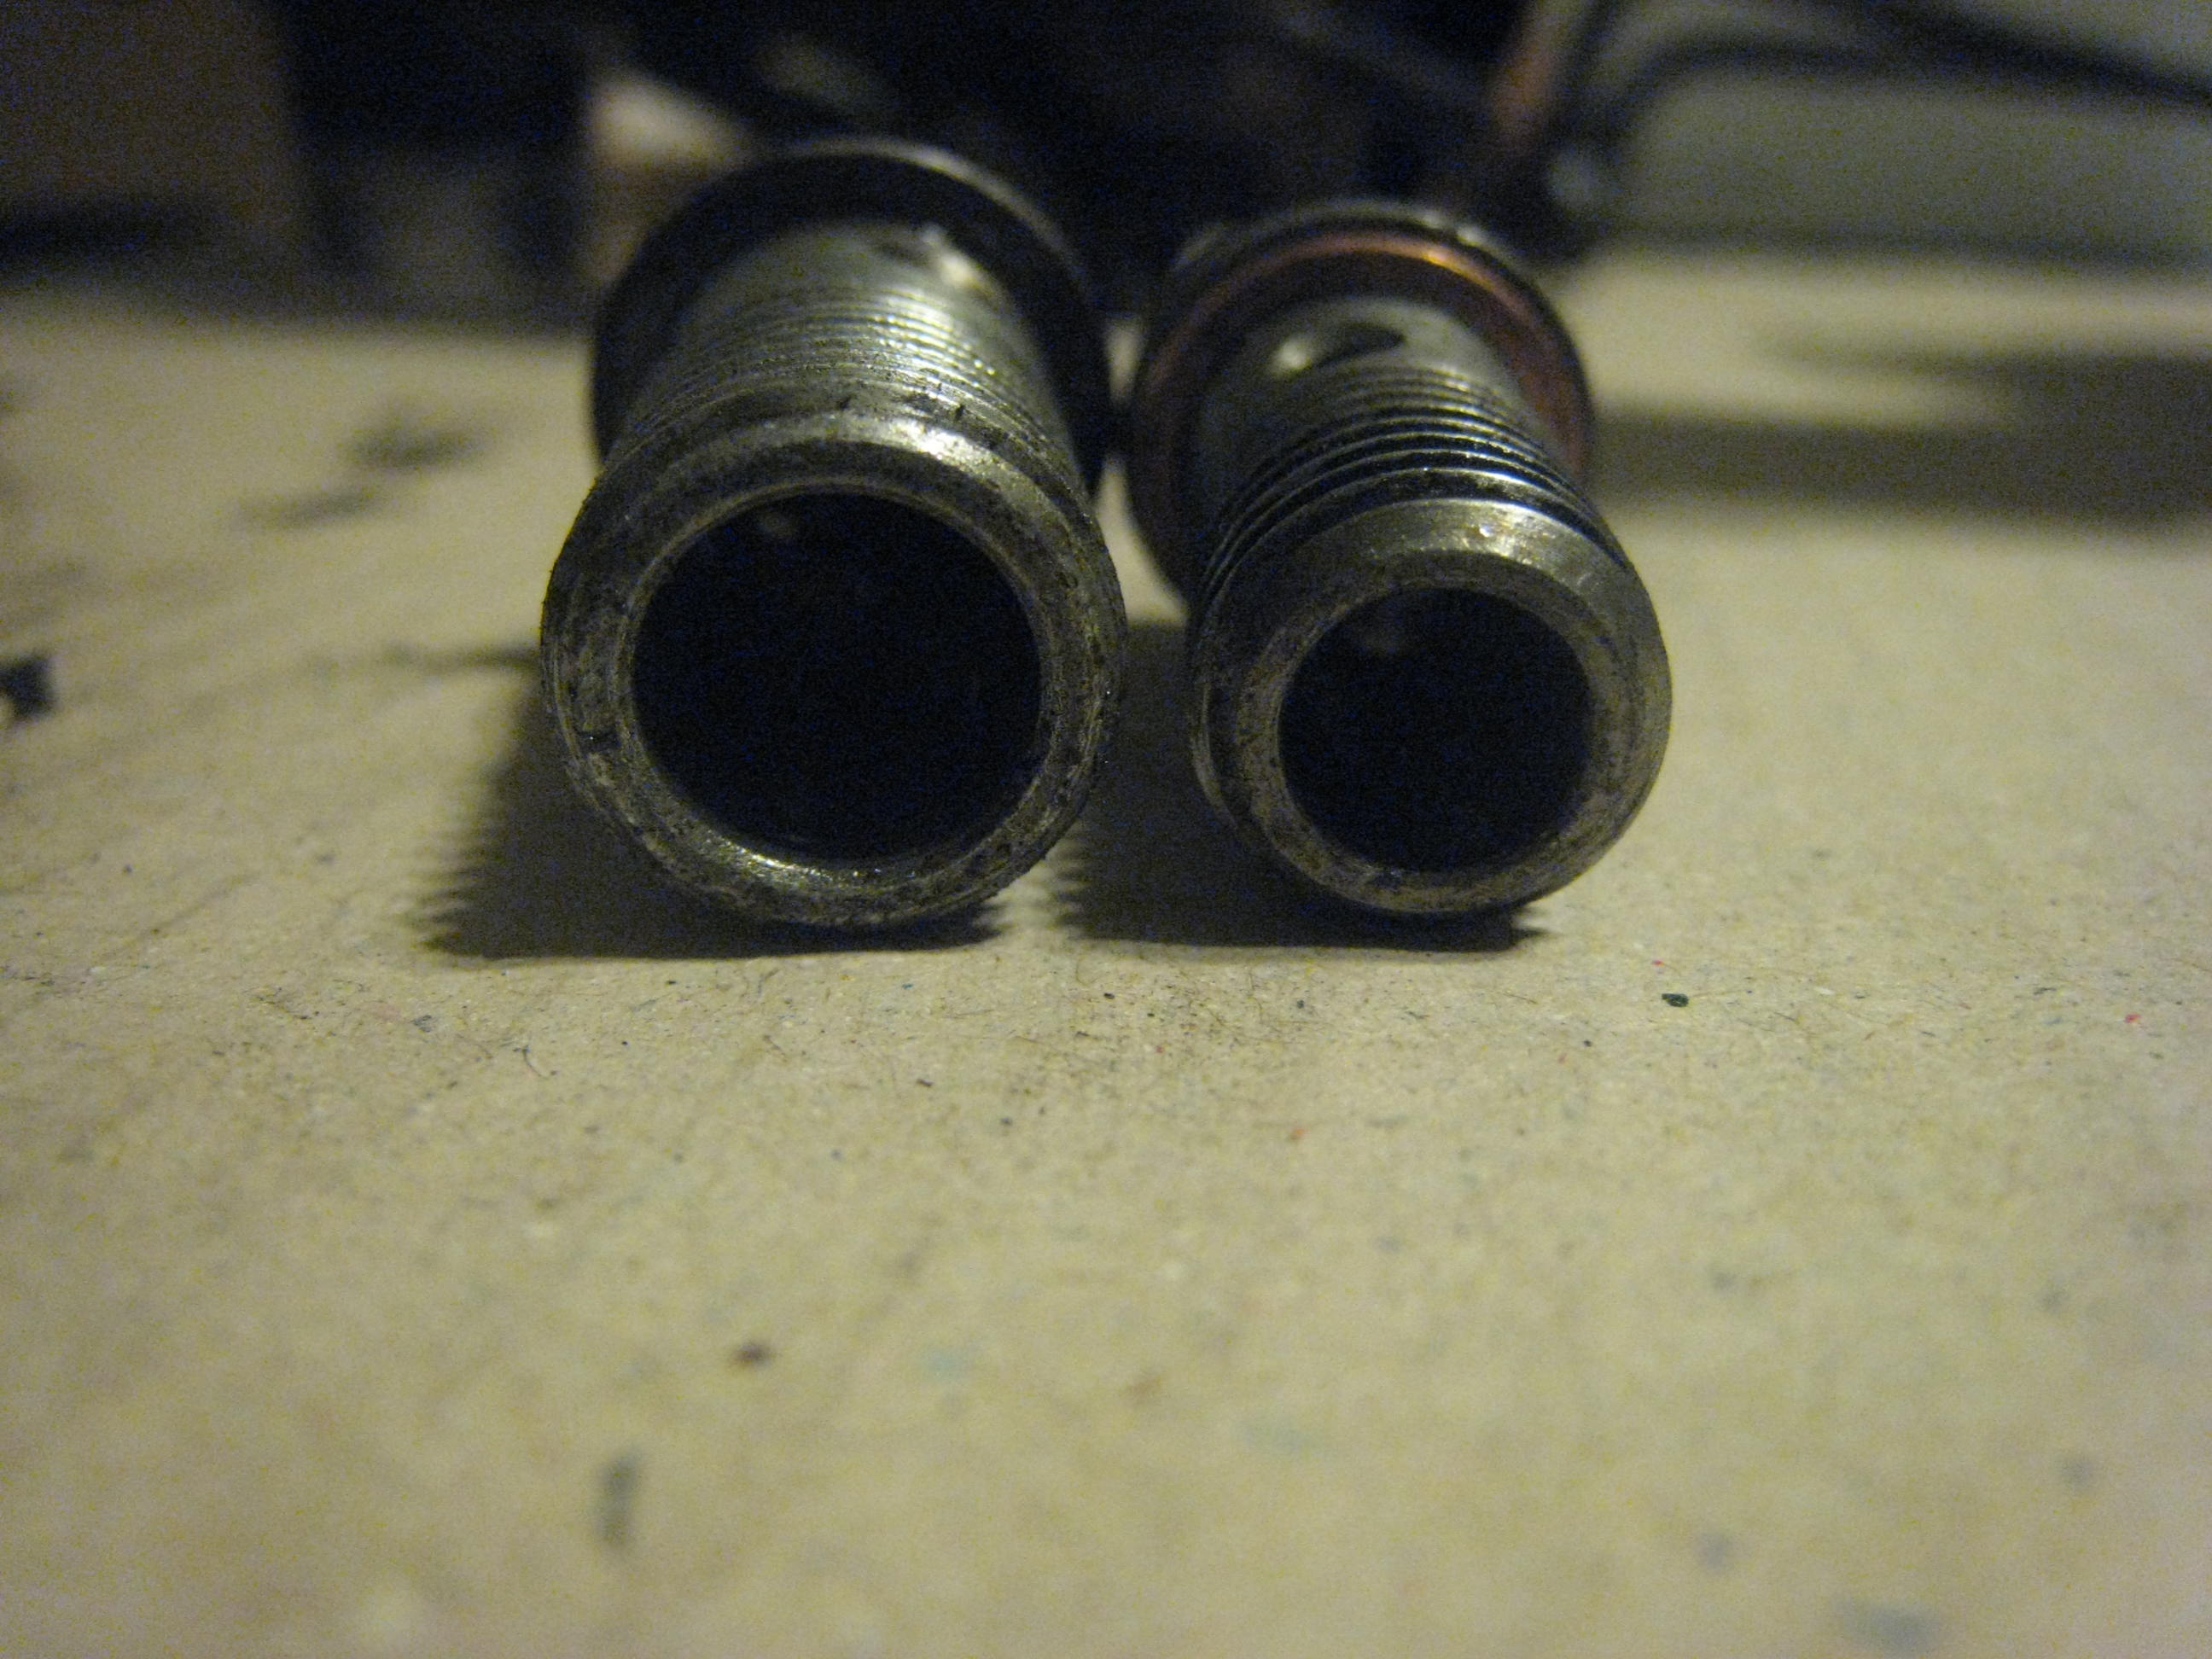
For the opportunist a failed turbo out of a base model SAAB 9-3 or 9-5 presents a rather fun opportunity. UPGRADE! The base model SAABs also designated light pressure turbo (LPT) were equipped with a Garrett GT17 turbocharger. Some have seen these turbos give them 200K miles (unlikely, but it’s happened). Others have been replacing these turbos annually due to premature failure. The upgrade comes in the form of the Aero model turbocharger the Mitsubishi TD-04. This turbo has proven not only to be more robust, but also supplies the greater pressures the Aero model comes with. The turbocharger and accompanying ECU software are virtually the only engine differences between the LPT and Aero models, so for practically the same price of a replacement Garrett you can upgrade your 9-5 or 9-3 to the Aero specs (given an ECU tune).
Is it a direct swap you may ask? The answer is virtually. The only difference are the turbo lines which have smaller sized banjo bolts on the turbo housing itself. It is therefore easiest to do the swap provided with the stock TD-04 turbo lines (turbo lines carry coolant and oil to and from the turbo).
Some may be content with knowing that they’ve repaired their car and now have a more robust turbo, but you need not stop there! A quick ECU flash will allow you to use your turbo to its fullest! There are several tuning houses for SAAB- some affordable some expensive. You can also do it yourself if you’re ambitious. All the info you need is found at http://www.ecuproject.com.
Feel free to comment with other thoughts/questions